Welcome… …To the Exelon Web Commerce tutorial. This tutorial will explain some basic concepts and describe the procedures you will use to process your Contract Invoices via the Internet using our electronic commerce service powered by GXS. Requirements
To use the Web Commerce service, you need access to the Internet and Microsoft Internet Explorer; the minimum version required is IE 7.0. You must have JavaScript and Cookies enabled. Please see the tutorials that reviews downloading and setting up Internet Explorer 6.0 before connecting to Web Commerce. You will be receiving email notification from [email protected] so you need to ensure that SPAM filters are set to allow this address. On-Line Help
This tutorial is available to assist you to become familiar with the Web Commerce application. It is a complete walk through of the site, including screen shots and a description of all features and functionality. If you have any additional questions and wish to speak to a customer service representative please call E-Markets Support at 1-877-446-6847. From the main menu choose option 1,1 and then 2 for Technical Support. Application Tools
This application has been designed to allow you to create and transmit Contract Invoices to Exelon. Site Walk Through The first screen you will see after log is the menu, which provides you access either the Procurement application, or the Vendor Managed Inventory application or the Contract Invoice application. This tutorial is for the Contract Invoice application. The documents are sorted by Exelon business unit and by clicking on the appropriate Exelon business unit logo you will taken to the Create Invoice screen for that business unit. Invoices must be submitted to the respective business unit. In some cases an image is required to be attached to the contract invoice, in other it may be attached at your option.
Also from the Create Invoice screen you will see that the Web Commerce application has been designed with navigational links and folder selections on the top and left sides of your screen. The icons across the top include Return to the Summary Page, Update/View Your Contact Information, Contact Support, Tutorials and Logout.
1. Return to the Summary Page:
this icon will return you to the summary page from
2. Update/View Your Contact Information:
update your contact information from anywhere in the application
3. Contact Support:
if you require support the telephone number/email addresses are found
4. Tutorials:
this icon provides a link to 3 tutorials for your assistance: the
Procurement/Invoice Tutorial is a complete walk through of the site including screen shots, the Vendor Managed Inventory Application and the Contract Invoice Application
5. Logout:
click this icon if you wish to logout of the application
The links down the left side of the screen show the Folders that are available. Folders
1. Invoice- The Invoice folder link will return the user to the Create Invoice screen. From here
the user can either create a new invoice or import an invoice in the Exelon Web commerce format.
2. Saved- The Saved folder shows any Invoice that has been saved as incomplete, it will be held
in this folder to be processed later. Invoices that require an attachment will also be saved here until the attachment is complete.
3. Sent-The Sent folder contains invoices that have been created and sent to Exelon 4. Errors-If any of the invoices are rejected by Exelon, they will appear in the Errors folder and an
email will be sent including a description of the error. The user will have the ability to update the invoice and resubmit.
How to use the application
1. Open the URL https://webec.inovisworks.net/webec/webec.html?CustProgram=WCEXE2 in
Internet Explorer. Enter in the Username and Password you were issued by Exelon at the time of registration in the appropriate spaces provided and click the Validate button.
2. Once you have clicked Validate the next screen that you will see shows a menu of the 3
applications available to you. By clicking the logo of the business unit that you deal with at Exelon in the far right column called Contract, the application will open to the Create Invoice screen for the contract invoices.
3. In the Web Commerce application, the documents will all flow through the various folders
starting with the Invoice folder which is where the Contract Invoices are created.
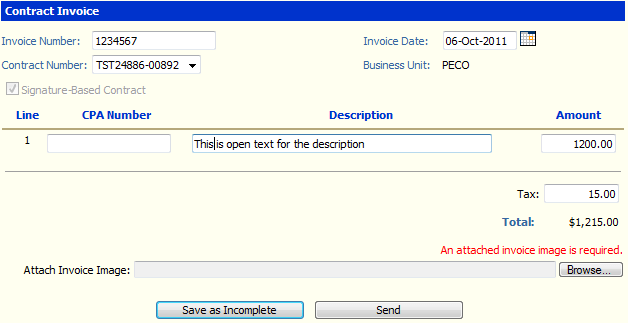
4. To create an invoice, the first mandatory field is an invoice number. This must be unique and
5. The Invoice Date will automatically default to today’s date but can be updated to a date in the
future by clicking on the calendar icon.
6. Click the arrow beside the Contract Number field to select the contract number you wish to
invoice against. Once you select a contract number, a flag will be added to indicate if the image is optional or required.
7. To complete the invoice, enter the CPA Number, the Description of the charge and the Amount and Tax if required. *Note – to enter a Credit Note enter a minus sign (-) in front of the dollar value.
8. The next step is to attach the image to the invoice. If the image is required, the text above the
Attach Invoice Image will read: “An attached invoice image is required” and you will be unable to send the invoice without the attachment.
9. The option to send an attached image is available if you wish to include one.
10. Click the link named Browse beside the data entry field called Attach Invoice Image. You will
be asked to select the file from your hard drive that you wish to attach to the invoice.
11. The file types that are accepted for attaching are DOC, RTF, TIF, JPEG, GIF, TXT and PDF 12. Once this information is complete, you can select:
a. Add Line to add a line item to the invoice, then complete this process again to add
b. Save as Incomplete to save the invoice without sending it to Exelon to return later by
opening it from the Saved folder,
c. Send to send the completed invoice to Exelon.
13. Once you Send the invoice, the screen will show the completed invoice and you can create
another invoice or view documents in the other folders.
14. The Saved folder will contain both invoices that were Saved as Incomplete and invoices that
require an attached image. Once you are ready to complete the invoice simple click on the Saved folder and select the invoice you wish to complete, and then follow the same steps as above.
15. The Sent folder will show all the invoices that have been completed and sent to Exelon. They
can be viewed or printed from this screen.
16. To Print an invoice, click the selection box beside the invoice number and Print under Actions
on the left side of the screen. The document will be paginated.
17. If any invoice is created but rejected by Exelon, the invoice will be moved to the Errors folder
and an email will be sent to the user. The email will include a description of the error to allow the user to go into the Errors folder, select the invoice and correct it. Once corrected it can be resubmitted to Exelon for payment.
18. The Saved, Sent and Errors folders all provide a Quick Search feature that allows the user to
enter an invoice number to quickly review an invoice.
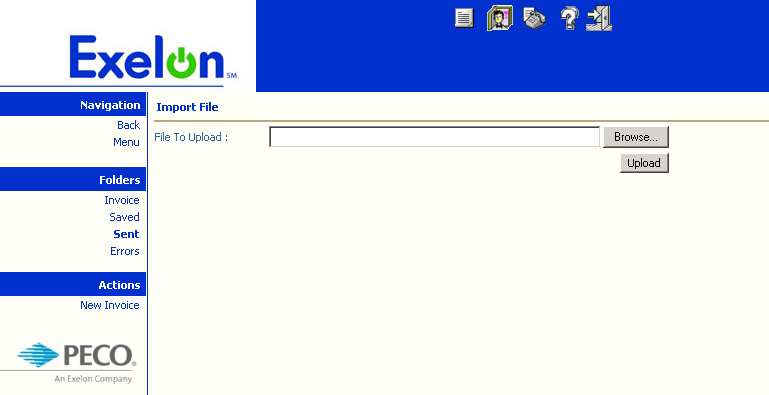
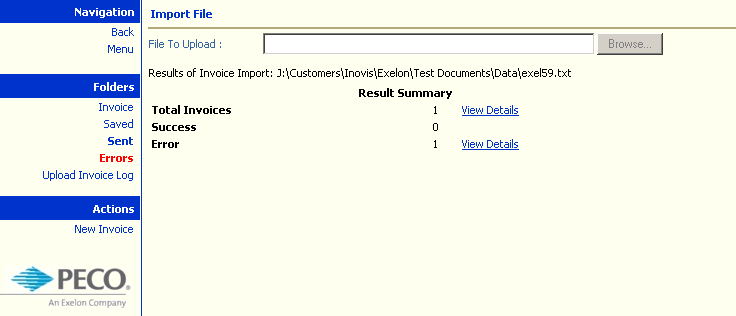
19. From the Invoice Folder the user can Upload an Invoice (s). The invoice(s) must be in the csv
format specified below. Once in the correct format the user can click on Upload Invoice and browse to identify where the file can be found.
20. Once the file has been selected, click Upload and the invoices will be loaded into the Web
Commerce application and will show the results of the upload, invoice successfully uploaded.
21. The results log is available to be viewed or exported to a csv file by clicking Upload Invoice
Log. Click the selection box to the left of the Date Loaded and click Export.
22. The next step is to attach the images. 23. If an image is not uploaded for any of the invoices that show in red that an image is required, the
invoice will be moved to the Saved folder and the image will be have to be uploaded at a later date prior to the invoice being sent to Exelon.
24. Once all the images have been selected for uploading, click the Upload Images link and the
invoices and images will be sent to Exelon.
Invoice Format The format that is required for an invoice to be imported into the application follows. The elements are delimited with a ‘~’ and each record is followed by a carriage return/line feed. The file must end with an ‘END’ record format.
Record Format Min Length Max Length That’s it You are now ready to use Web Commerce to do business.
UAMS Oral Health Clinic Patient Registration Form Patient Information: atient Information: Name _____________________________________________________________________________ Male or Female Date of birth _____________________ SSN ___________________ Referred by _________________________ Address _______________________________________________________________________
Seite 1 Sicherheitsdatenblatt gemäß 1907/2006/EG, Artikel 31 MSDS finicon® micro-PM RTU Sicherheitsdatenblatt 1. Stoff-/Zubereitungs- und Firmenbezeichnung 1.1 Handelsname: finicon® micro-PM RTU 1.2 Verwendung des Stoffes / der Gemisches: Anwendungsfertiges Gemisch. Nicht für den Endanwender geeignet. (Biozide PT18) 1.3 Einzelheiten zum Lieferanten, der das Sic
 Welcome…


 Also from the Create Invoice screen you will see that the Web Commerce application has been
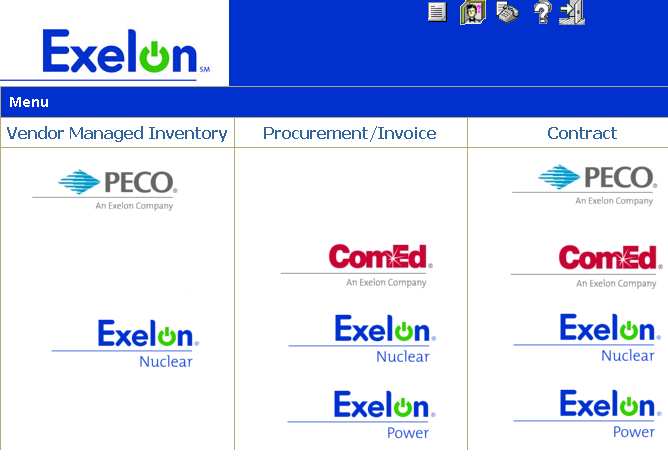
 1. Open the URL https://webec.inovisworks.net/webec/webec.html?CustProgram=WCEXE2 in
Internet Explorer. Enter in the Username and Password you were issued by Exelon at the time of
1. Open the URL https://webec.inovisworks.net/webec/webec.html?CustProgram=WCEXE2 in
Internet Explorer. Enter in the Username and Password you were issued by Exelon at the time of 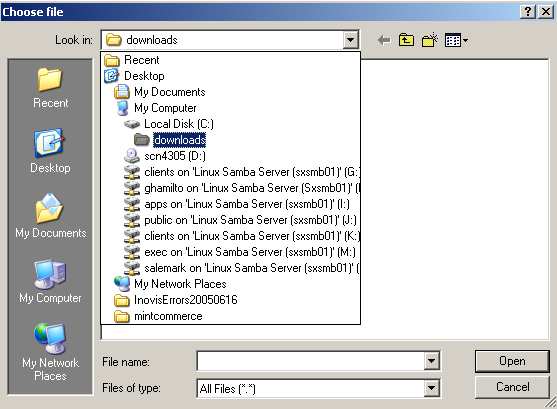
 20. Once the file has been selected, click Upload and the invoices will be loaded into the Web
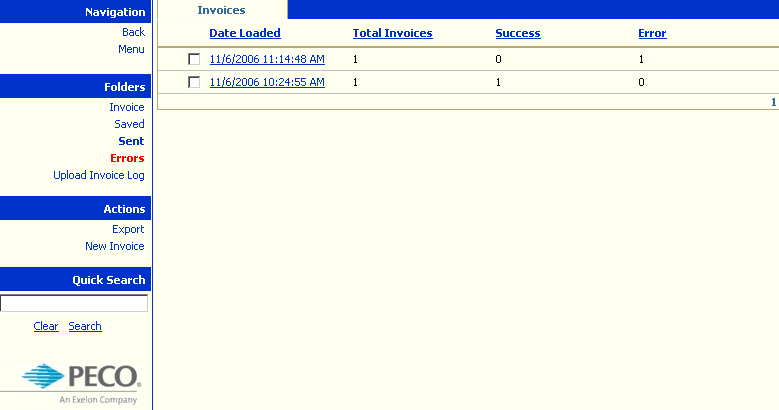
 22. The next step is to attach the images. 23. If an image is not uploaded for any of the invoices that show in red that an image is required, the
invoice will be moved to the Saved folder and the image will be have to be uploaded at a later date prior to the invoice being sent to Exelon.
24. Once all the images have been selected for uploading, click the Upload Images link and the
22. The next step is to attach the images. 23. If an image is not uploaded for any of the invoices that show in red that an image is required, the
invoice will be moved to the Saved folder and the image will be have to be uploaded at a later date prior to the invoice being sent to Exelon.
24. Once all the images have been selected for uploading, click the Upload Images link and the